Here at TDS we’re not immune to SnapChat’s charms. In fact, we’ve created a few On-Demand Geofilters for TDS internal events—but did you know that you can submit Personal Geofilters for your own events and activities?
You can create something that will appear at your wedding venue, graduation party, Halloween bash, or whatever you’re celebrating—it’s simple, and can be done for as little as $5! Here’s how:
1. Create a graphic that fits Snapchat’s guidelines.
The file must be a PNG with a width of 1080 pixels, a height of 1920 pixels, and it can only be 300KB or less. The PNG must also have a transparent background with the imagery of your filter toward the outside, bottom or top.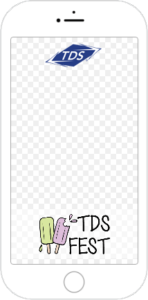 The image to the left is of a Geofilter we used for our company picnic, as an example.
Note: because our filter was for business, we could include a logo. For Personal Geofilters, you’re not allowed to do the same. For more tips and restrictions, check out the Snapchat guidelines.
You must create your design on Photoshop or Illustrator (or, enroll in 30 day free trial of Canva for Work and create a Geofilter by following this tutorial).
If you’re not feeling crafty enough to make your own, Snapchat also offers some free templates that are already in the correct format to make your life easy.
2. Log in and submit your Geofilter.
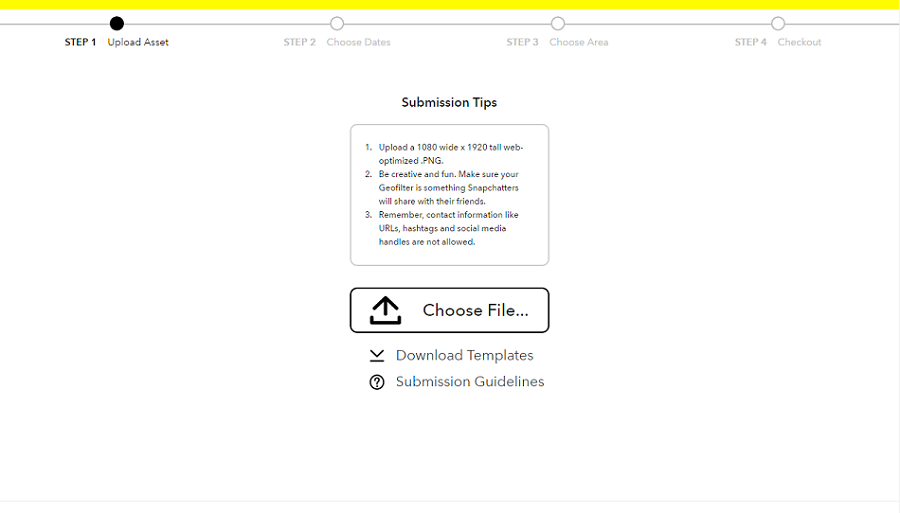
When you go to the Snapchat website you’ll be prompted to login. After you log in, you can start uploading your Geofilter.
The first step is to upload your file. If you follow the width and height requirements for the PNG, do not move the filter. Name your filter and go to the next step.
3. Select the date(s) and times you would like the filter to be available.
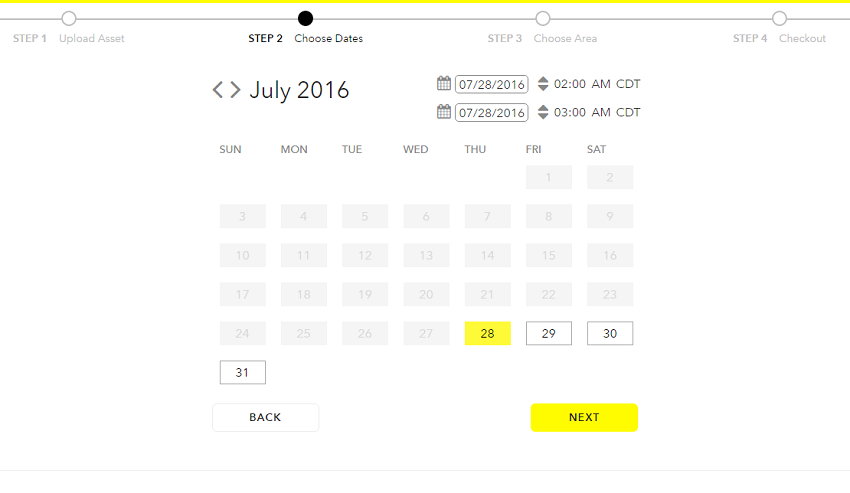
Keep in mind that the longer your Geofilter is available, the more it will cost.
4. Select the area you’d like your filter to cover.
To do this, click “Draw Fence”. It must be a minimum of 20,000 square feet and a maximum of 5,000,000 square feet.

If you’re having difficulty seeing the area you’d like to fence in, try changing the map to satellite in the upper left corner.
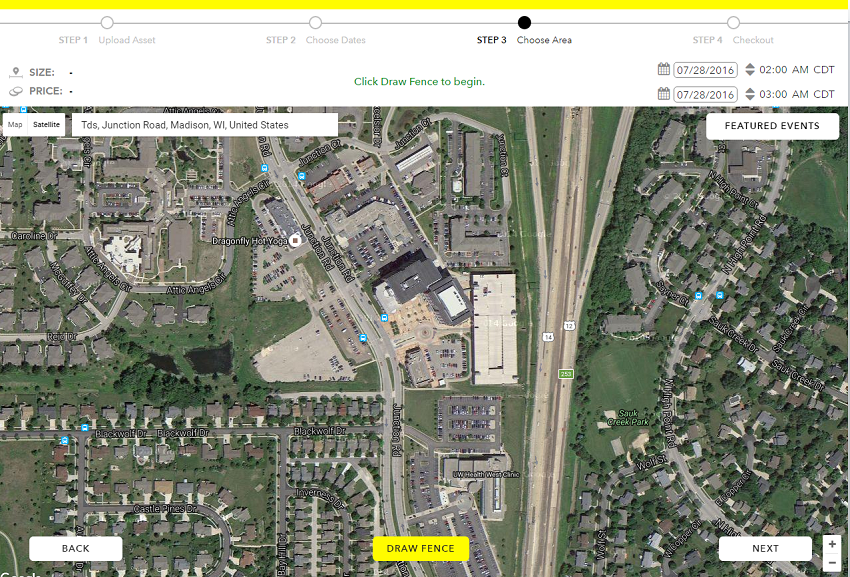
Once you draw your fence, you’ll get a price estimate based off of the square footage, location, and timeframe.
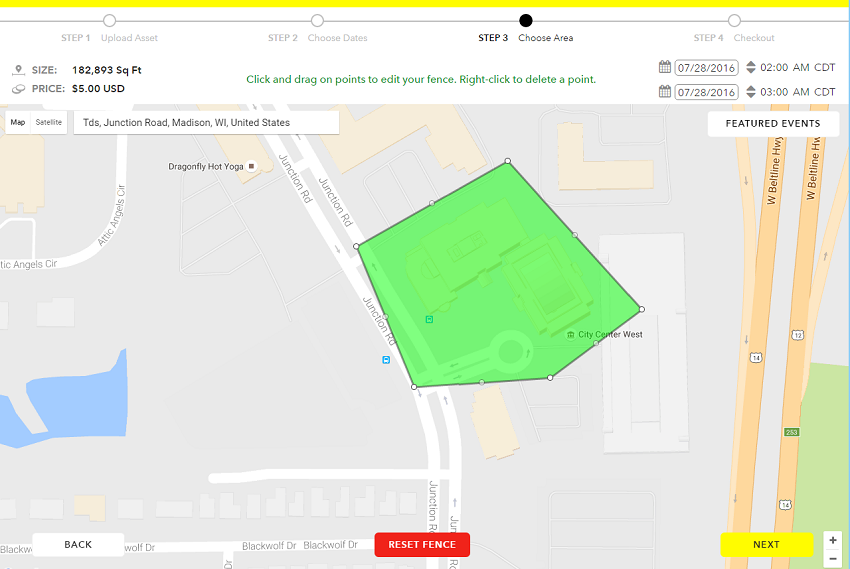
Tip: Always check the date and time in the upper right corner before going to the next page. Sometimes a glitch changes the times you selected on the previous screen. So, to be safe, double check the timeframe before submitting it—once it’s submitted, you can’t go back and edit.
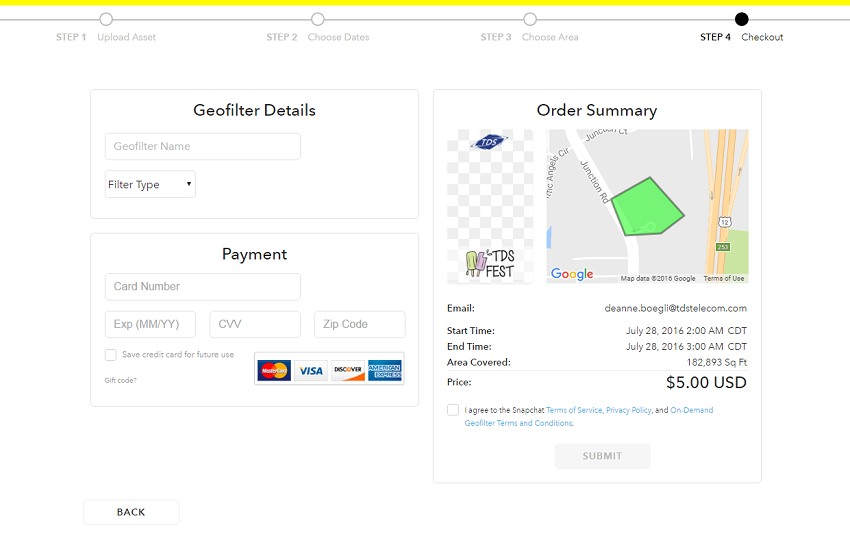
5. Enter a form of payment and submit your Geofilter for review.
The review process typically takes 24 hours, but it’s always a good idea to submit your filter as early in advance as possible just in case.
 6. Enjoy the filter at your event!
You will receive an email once your Geofilter is approved, at the time your Geofilter is available, and once the time has elapsed.
And, if you want to know if anyone used your filter, metrics are available about a week after your event. They aren’t extremely detailed, but they show how many people saw your Geofilter and how many people used your Geofilter.
Happy snapping!
Guest Blogger: Chloe Wiersma
Chloe is a Public Relations and Communications Intern at TDS. She is studying Communication, Public Relations, and Business Administration at the University of Wisconsin — Stevens Point. When Chloe isn’t searching for the perfect Instagram filter, you can typically find her reading a book next to her Shih Tzu Bichon mix.


Pingback:Holiday Party karaoke comes to TDS TV | TDS Home